


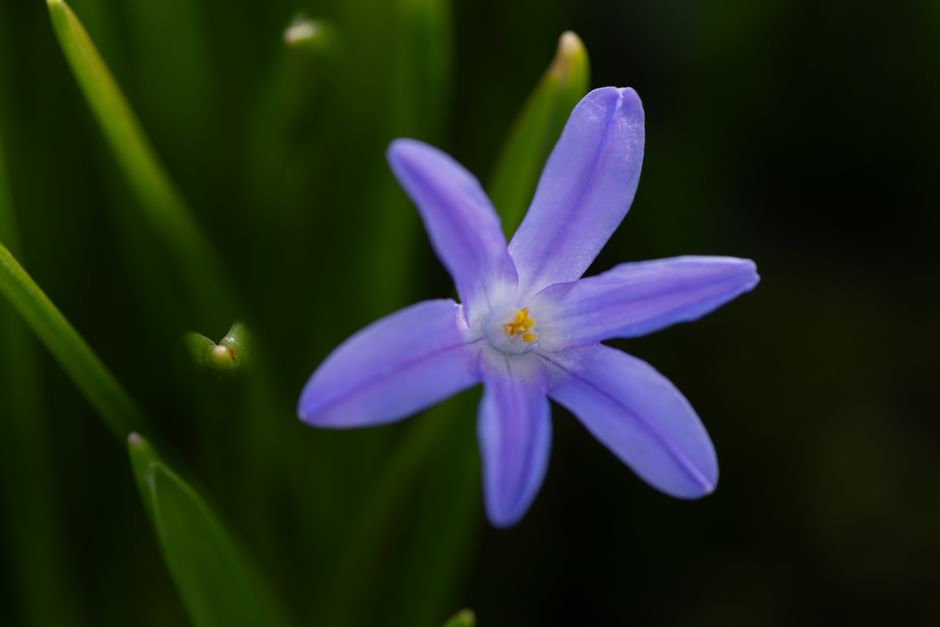
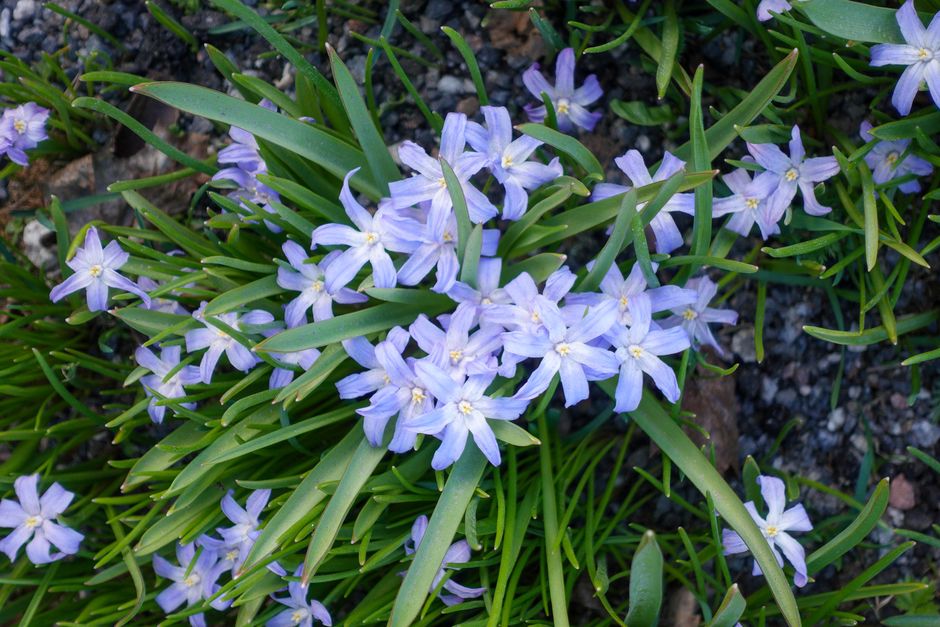
If you have ever glanced outside on a grey March morning to find a ripple of electric blue pushing through the last of the frost, chances are you were looking at Chionodoxa. Glory of the snow earns its name honestly. While most of the garden is still locked in brown dormancy, this little bulb sends up clusters of star-shaped blue flowers that often push straight through a late dusting of snow, arriving alongside or even a touch before crocus and snowdrops. Established plants multiply year after year, and a modest autumn investment of a handful of bulbs can, within a few seasons, become a sweeping carpet of colour across a lawn, a rockery, or the ground beneath a deciduous tree.
The combination of extreme cold hardiness, reliable naturalisation, ease of cultivation, and vivid early-spring colour makes Chionodoxa indispensable for woodland gardens, rock gardens, and naturalising in grass. Whether you are gardening in Budapest, Vienna, or anywhere else across temperate Central Europe, this guide gives you the complete process: planting in autumn, protecting through winter, managing after flowering, and harvesting offsets to expand your display.

Key Takeaways
-
Plant bulbs in autumn, not spring. Plant Chionodoxa bulbs in autumn so that they bloom in early spring. In Hungary and Central Europe, the ideal window is September through October, before the ground hardens.
-
Depth and spacing are simple. Plant Chionodoxa bulbs 5 cm deep and 5-7.5 cm apart, or approximately 15 bulbs per 30 cm square. Use these numbers as your planting benchmark.
-
Leave the foliage alone after flowering. After blooming, allow the leaves to die back naturally. The leaves are feeding the bulb for next year's bloom. Cutting them early is the single most common reason plants weaken.
-
Chionodoxa naturalises and multiplies for free. Chionodoxa are excellent naturalisers because they multiply in two different ways. Over time, "daughter" bulbs form alongside the original bulbs. The blossoms also produce seeds. Expect your initial planting to expand noticeably after two or three seasons.
-
Pests and disease are rarely a concern. Chionodoxa are generally pest- and disease-free, which makes them one of the friendliest choices for beginner and experienced gardeners alike.
Quick-Start Prioritisation Framework
| Situation | Recommended Approach | Effort Level | Time to Results |
|---|---|---|---|
| New garden from scratch | Plant 50-100 bulbs in clusters under deciduous trees | Low | First spring |
| Lawn naturalisation | Scatter and plant in random groups through turf | Low | First spring, self-seeds year 2+ |
| Container display | Plant 8 cm deep in gritty compost, move to shelter | Medium | First spring |
| Expanding an existing colony | Lift and divide overcrowded clumps in late May | Low | Next spring |
| Seed propagation | Collect ripe pods, sow immediately in a cold frame | High | Second or third spring |
Start here if you are:
-
A first-time bulb gardener: Purchase 50 bulbs in autumn and plant them in clusters in a sunny border. Effort is minimal and results arrive reliably in March.
-
Naturalising under trees: Plant generous drifts of 20 or more at a time and leave them undisturbed. The colony will grow itself.
-
Working with a small courtyard or balcony: Choose a deep container with drainage holes, plant at 8 cm depth, and move the pot to a sheltered wall over winter.
Step 1, Choose Your Site and Prepare the Soil
Where Chionodoxa Thrives
For optimal growth, choose well-drained soil and position the plant in full sunlight. However, this versatile plant also thrives in partial shade beneath deciduous shrubs or trees. This last point is particularly useful in Hungarian gardens, where mature oak and chestnut trees are common. This clever placement allows Chionodoxa to capture sunlight during early spring, prior to the trees adorning their leaves. The result: full sun when the plant needs it, and natural summer shade that suits the bulb's dormant period.
Chionodoxa prefers a soil pH of 6.0 to 7.0 in rich, moist but well-drained conditions. If your plot has heavy clay, common in parts of the Pannonian Plain, take action before planting. If you have a heavy soil or soil with a high clay content, it is a good idea to incorporate plenty of compost and some grit or sand prior to planting to aid drainage. A poorly drained spot causes bulb rot, which is the main avoidable failure with this plant.
Companion Planting for Visual Impact
The flowers are good companions for other early spring bulbs including snowdrops, scilla, crocus and early daffodils. In my experience, alternating blue Chionodoxa with white snowdrops and yellow miniature narcissi creates a natural colour sweep that looks as though it grew without any planning at all, which is exactly the effect most gardeners want.
Pro Tip: Plant Chionodoxa in groups rather than rows. Chionodoxa look best when the bulbs are planted in clusters as they would grow naturally. A scattered, uneven arrangement mimics how wild colonies form and produces a far more convincing drift of colour than a neat grid.
Step 2, Planting the Bulbs Correctly
When to Plant in Central Europe
Chionodoxa should be planted between September and early December for best results. In Hungary, aim to complete planting by the end of October. Soil temperatures drop quickly through November, and bulbs need time to establish roots before the ground freezes. Like all flower bulbs, Chionodoxa need a cold period to develop their roots and get ready for spring. This is not a hardship to manage, Central Europe's winters provide that cold period naturally.
How to Plant, Step by Step
-
Inspect your bulbs before planting. The most important factor is the way that the bulb feels. As long as the bulb feels firm, it is a good and viable bulb. Soft or mushy bulbs should be discarded.
-
Dig to the correct depth. Use a trowel or dedicated bulb planter to create holes, each about 5 cm deep and spaced 5 cm apart. For a denser, more natural display, Peter Nyssen's Chionodoxa planting guide recommends planting 75 to 100 bulbs per square metre.
-
Orient the bulb correctly. Make sure you place the bulb the right way up. Chionodoxa bulbs look like a little onion with a slightly pointy head and sometimes have wiry roots growing out of the underside, plant with the pointy head or spike pointing up.
-
Water in after planting. To help the bulbs settle and grow roots quickly, it is important to water them well after planting, but after that you will not have to water them again until spring.
-
Mulch in extreme conditions. If your garden is in a zone that is either too cold or only marginally appropriate, apply no more than a 5 cm layer of mulch after the ground surface freezes in autumn. The mulch should trap cool temperatures into the soil. Mulch helps to protect the bulbs from arctic temperature spikes. Good choices include straw or dry oak leaves.
Step 3, Growing and Caring Through the Seasons
Spring Care: Watering and Feeding
During blooming season, you generally do not have to water your Chionodoxa, but you can water them when there has been no rain for three to five days. For in-ground plantings in Central Europe, spring rainfall is usually sufficient. Container-grown plants need more attention, as pots dry out faster.
For feeding, After blooming, allow the leaves makes clear that After blooming, allow the leaves feeding. If your soil is poor, you might want to add a bulb fertiliser in early spring, just as the new growth begins to emerge. For containers, Peter Nyssen's Chionodoxa planting guide weeks with a high-potash fertiliser such as liquid seaweed for strong blooms. If you are seeing noticeably smaller flowers year on year, this is your signal to start a fortnightly feed from the moment shoots appear.
After Flowering: The Critical Foliage Phase
This is the stage where most gardeners go wrong. After the flowers die back, the foliage continues to grow, which is a good thing: a prolonged period of photosynthesis helps bulbs grow and multiply with little baby offshoots for even more flowering spikes in future years.
Remove the dry foliage only when the leaves turn yellow and die back around late spring or early summer. In Hungary, this typically happens by June. Do not be tempted to tidy up earlier. Do not tie up or knot the leaves either; it might look tidier, but can actually prevent a good flowering display next year.
Pro Tip: If Chionodoxa is naturalised in your lawn, do not mow or cut back plants that are growing in grass until the foliage has died back. This gives the Chionodoxa a chance to self-seed and naturalise. Raise your mower blades and hold off until mid-June when the leaves have yellowed completely.
The Pollinator Benefit
The flowers are an important early nectar source for the first bees of the season. In Central European gardens, where early spring food for pollinators is scarce, a drifted planting of Chionodoxa provides a genuine ecological contribution. Spring bulbs are among the very first flowers to bloom in late winter and into early spring. These early blooming flowers ensure that bees are able to feed before other native nectar sources are readily available. Plant generously and you help both your garden's beauty and its local biodiversity.
Step 4, Harvesting Offsets and Propagating Your Colony
Understanding How Chionodoxa Multiplies
When Chionodoxa is happy where planted, it can naturalise by both bulb offsets (baby bulbs on the sides of the mother bulb you have planted) and even self-sowing seed. This dual strategy means that, left undisturbed, a planted colony expands reliably each year without any intervention on your part.
Ants often collect and distribute Chionodoxa seeds, which is why it is not unusual to see the flowers popping up here and there around the yard. If you want to keep the spread orderly, deadhead spent flowers before seed pods form. If you want maximum naturalisation, leave them be.
When and How to Divide
Over time, a large patch of Chionodoxa can become overcrowded. To reinvigorate the area, gently dig up and relocate some of the clumps shortly after they finish flowering. According to Anglia Bulb Company's Chionodoxa care guide, the ideal time to divide is late May. Anglia Bulb Company's Chionodoxa care guide in late May, then replant or dry and store in a cool dark place for autumn planting.
To collect seeds deliberately: collect seed capsules when they turn brown and sow immediately in pots of gritty, well-drained compost. Seeds germinate the following spring after winter cold stratification. Seedlings are tiny and should be left in their pots for two years before planting out. Seed propagation is slow but rewarding if you want to produce large numbers of plants at very low cost.
Step 5, Protecting Chionodoxa from Threats
Winter Protection
Chionodoxa are fully hardy and will be fine outdoors without frost protection throughout winter across most of Central Europe. In-ground plantings in Hungarian gardens need no special treatment. Container plants are the exception: pots allow temperatures to fluctuate more dramatically than the open ground, and flower bulbs should never be planted in outdoor containers, window boxes or raised beds where bulbs experience temperature spiking and repeated cycles of freezing and thawing. This results in root growth failure, root system destruction, frozen bulbs and/or bulb rot from poor water drainage. Move containers to an unheated shed or garage, or press them close to a sheltered house wall for the coldest months.
Pest and Disease Considerations
Good news: Peter Nyssen's Chionodoxa planting guide serious diseases or pest problems. The most frequent practical issue is not a pest at all but over-watering or poor drainage, which leads to bulb rot. Careful not to waterlog or overwater this plant because Chionodoxa bulbs are likely to rot if grown in overly moist soil.
The main fungal risk to monitor in damp springs is botrytis (grey mould). Partially decomposed compost can spread fungal disease, such as botrytis blight and nasty pests. Avoid applying fresh, half-rotted material directly around bulbs. If you spot the characteristic grey, furry growth on plant material, CANNA Gardening's Botrytis guide notes that you must never allow infected plant parts to come into contact with other plants, and good ventilation is essential in order to maintain lower humidity around the leaves and flowers. Remove affected material promptly, improve air circulation, and avoid overhead watering.
Rodents and deer rarely bother these carefree spring-blooming bulbs, which is one of the practical advantages Chionodoxa has over tulips in a garden shared with wildlife.
Pro Tip: If squirrels are a problem in your garden, Chionodoxa is naturally resistant. Hardy, only 10-15 cm tall, deer- and rodent-resistant, squirrels largely ignore Chionodoxa unlike tulips. Plant freely without the worry of losing bulbs over winter.
Choosing the Right Chionodoxa Variety
The three varieties you are most likely to find at a garden centre or through specialist bulb suppliers such as Holland Kertészet differ mainly in flower size, count, and intensity of colour.
| Variety | Flowers per Stem | Colour | White Eye | Notes |
|---|---|---|---|---|
| C. forbesii | 4-12 | Bright blue | Large, distinct | Most common in trade; best for large drifts |
| C. luciliae | 1-2 | Soft violet-blue | Small | Larger individual flowers; slightly shorter stem |
| C. sardensis | 4-8 | Intense blue, no violet | Absent or very faint | Flowers earliest; more outward-facing |
| C. forbesii 'Pink Giant' | Up to 12 | Pink | Diffused white | Cheerful contrast to blue varieties |
| C. luciliae 'Alba' | Up to 8 | Pure white | None | Clean, elegant; good with darker companions |
According to BBC Gardeners' World Magazine's Chionodoxa grow guide, Chionodoxa forbesii 'Blue Giant' produces larger blue flowers than C. luciliae, with a whiter centre, while Chionodoxa sardensis flowers earlier than C. luciliae, with larger blooms. For the most dramatic carpet effect in a European garden, C. forbesii and its cultivars are the practical first choice. For earliest colour and intensity, C. sardensis is worth planting alongside.
Common Mistakes to Avoid
-
Planting too shallowly, bulbs at less than 5 cm depth are vulnerable to temperature swings.
-
Cutting back foliage too soon, starving the bulb of the energy it needs for next season.
-
Planting in waterlogged ground or heavy clay without improving drainage first.
-
Over-fertilising with nitrogen-rich feeds, which promotes leaf growth at the expense of flowers. Use a high-potash fertiliser instead.
-
Assuming container-grown bulbs will survive outdoors through a Central European winter without protection.
Frequently Asked Questions
When is the best time to plant Chionodoxa bulbs in Hungary?
Plant the bulbs in autumn, from September through November, 5-8 cm deep and 5-8 cm apart, in generous clusters rather than rows. In Hungary, the ideal window is late September to late October. The bulbs need several weeks of root development before the ground freezes, so earlier is better than later. Bulbs stored beyond December begin to deteriorate.
How do I know when to harvest and divide my Chionodoxa bulbs?
Peter Nyssen's Chionodoxa planting guide every few years to prevent them from losing some of their flowering potential. The visible sign that division is needed is noticeably fewer or smaller flowers from a colony that previously performed well. Late May, once the foliage has yellowed but before the soil dries out in summer, is the best practical moment to dig and replant.
Can I grow Chionodoxa in containers on a balcony or terrace?
Yes, though containers require more care. Optimal planting in containers involves selecting a sizeable container with effective drainage holes to prevent waterlogging of the compost. Prepare the container by combining two parts of bulb compost or multipurpose compost with one part potting grit. This mixture ensures excellent drainage. Move the container to a sheltered, frost-free but cool position (such as an unheated shed) during the coldest months to prevent the freeze-thaw cycles that damage bulbs.
How quickly does a Chionodoxa planting spread?
Plant a handful in autumn and within a few seasons you will have hundreds: Chionodoxa multiplies by underground offsets and seeds itself around freely, knitting into spreading carpets under deciduous trees, across rock gardens, and even through lawns. Expect a modest group of 20 bulbs to triple in size within three years under good conditions.
Is Chionodoxa safe around pets and children?
Chionodoxa belongs to the Asparagaceae family, and like many members of that family, it contains compounds that can cause mild stomach upset if ingested in quantity. Keep children and pets from eating the bulbs or foliage. As a precaution, wash hands after handling bulbs, and contact a vet or medical professional if you suspect ingestion. For general garden placement, the small size of the plant and its brief growing season make accidental contact unlikely.
Closing Thoughts
Growing Chionodoxa is one of the most rewarding decisions you can make for a spring garden in Central Europe. The work is concentrated in a single autumn afternoon, and the returns, colour, naturalisation, pollinator support, and year-on-year multiplication, go on for decades. Start with a generous initial planting of at least 50 bulbs in a single sweep, leave the foliage to feed the bulbs after flowering, and let the plant do the rest.
For bulbs suited to Hungarian growing conditions, Holland Kertészet stocks a range of spring-flowering bulbs to complement your Chionodoxa display.
Sources
-
Chionodoxa Planting Guide, DutchGrown. Full growing guide for glory of the snow bulbs. https://www.dutchgrown.com/blogs/the-dutchgrown-blog/how-to-grow-chionodoxa
-
How to Grow Chionodoxa (Glory of the Snow), Marshalls Garden. Step-by-step growing and container guide. https://marshallsgarden.com/pages/how-to-grow-chionodoxa-glory-of-the-snow
-
How to Grow Chionodoxa, BBC Gardeners' World Magazine. Expert UK growing guide including variety selection. https://www.gardenersworld.com/how-to/grow-plants/how-to-grow-chionodoxa/
-
All About Chionodoxa, Longfield Gardens. Comprehensive naturalising and care advice. https://www.longfield-gardens.com/blogs/all-about-fall-planted-bulbs/all-about-chionodoxa
-
How to Grow Glory of the Snow (Chionodoxa), Urban Lotus Project. Practical guide covering planting, naturalising, and wildlife value. https://urbanlotusproject.org/how-to-grow-glory-of-the-snow/
-
How to Plant Chionodoxa Bulbs, Peter Nyssen. European bulb specialist planting and care guide. Peter Nyssen's Chionodoxa planting guide
-
Chionodoxa Planting Instructions, Farmer Gracy. Detailed autumn-planting instructions for UK and European gardeners. https://www.farmergracy.co.uk/blogs/planting-care/chionodoxa-planting-instructions
-
Chionodoxa Horticultural Tips, John Scheepers. Bulb quality, feeding, and naturalisation guidance. https://www.johnscheepers.com/hchionodoxa.html
-
Chionodoxa (Glory of the Snow), Gardenia.net. Watering, feeding, propagation and pest overview. After blooming, allow the leaves
-
Chionodoxa Forbesii, Anglia Bulb Company. Division timing and container growing advice. Anglia Bulb Company's Chionodoxa care guide
-
Botrytis cinerea, Pests and Diseases, CANNA Gardening. Grey mould identification, prevention and management. https://www.cannagardening.com/articles/botrytis-cinerea-pests-diseases
-
Chionodoxa Care Guide, Sproutl. Post-flowering foliage and feeding advice. https://www.sproutl.com/aftercare/chionodoxa
-
Glory-of-the-Snow: Planting, Care and Companion Flowers, Plot My Garden. Seed collection and propagation timelines. https://plotmygarden.com/plants/chionodoxa
-
Flower Bulbs That Bees Like, Gardening Know How. Spring bulbs for pollinators guide. Spring bulbs are among the very


