

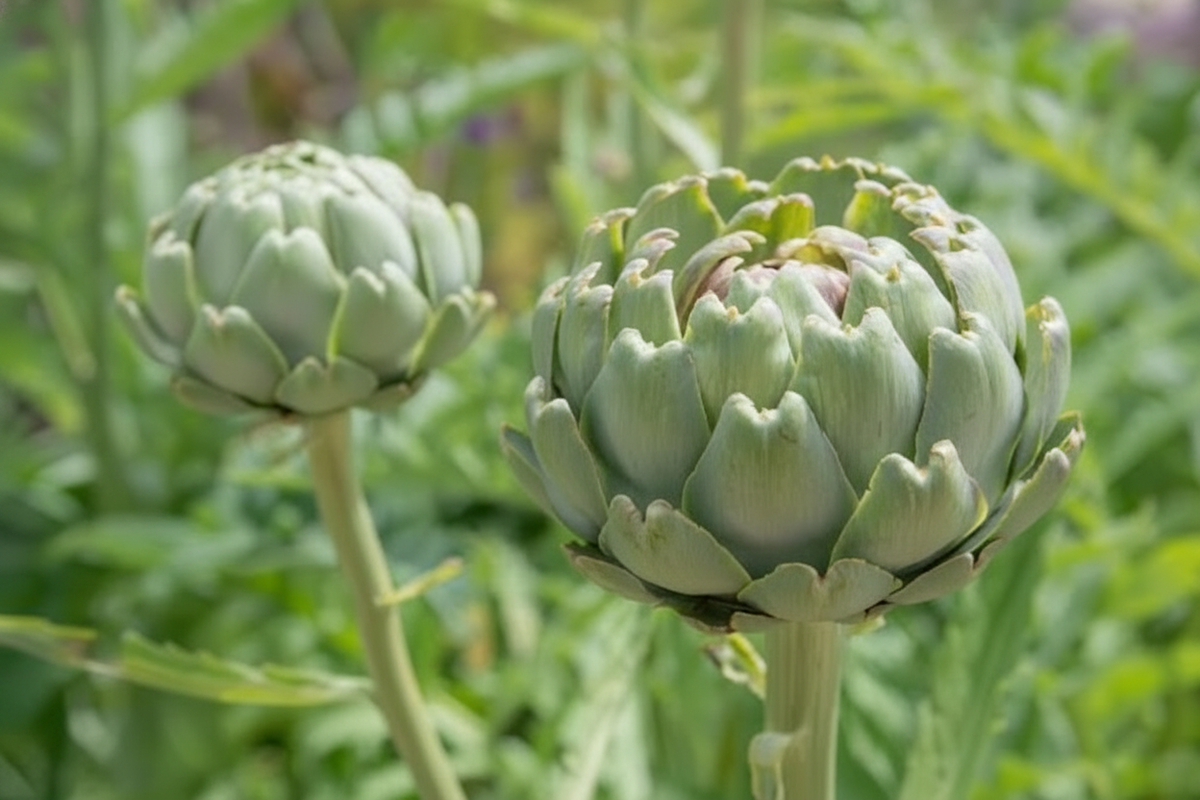
From one bold seedling to your first tender, home-grown artichoke heart.
|
GROW WITH US You do not need a greenhouse, perfect soil or years of experience. You need a sunny place, a little patience and the confidence to notice what your plants are telling you. |
Written for home gardeners in Hungary
CHAPTER WELCOME
Your artichoke adventure starts here
This book follows the whole journey: seed → seedling → garden → care → bud → kitchen → winter → next season.
Artichokes are vegetables with presence. Their huge silver-green leaves can make an ordinary vegetable bed look almost Mediterranean, and the part we eat is not a fruit at all—it is an unopened flower bud. Leave one unpicked and it opens into a spectacular purple thistle-like flower.
They can also puzzle a beginner. Will they survive a Hungarian winter? Why is my plant all leaves and no buds? When exactly do I cut the bud? And what on earth is the “choke”? This book answers those questions step by step, without pretending that every Hungarian garden has the same winter.
Our Hungarian calendar
|
February–March |
Sow indoors and grow seedlings in strong light. |
|
April |
Pot on; build sturdy plants and prepare a sunny bed. |
|
Late April–May |
Harden off and plant when hard frost is no longer expected. |
|
June–August |
Water in dry spells; established plants may begin producing buds. |
|
June–September |
Harvest tight buds from established or first-year-cropping varieties. |
|
October–November |
Tidy plants and prepare crowns for winter protection. |
|
WHAT I WOULD DO In most Hungarian gardens I would rather plant a healthy tomato a few days late than a chilled tomato a week early. Mid-May is a useful guide, not a guarantee: western Hungary, Budapest, exposed valleys and warm urban gardens can behave differently. |
The rule for this series: dates guide us, but the plant, the weather and your own garden make the final decision.
CHAPTER 1
Meet the Artichoke
Before we sow anything, let’s meet one of the most architectural vegetables you can grow.
The globe artichoke is a Mediterranean member of the thistle family. It loves sun, fertile soil, room to spread and a long season. In a mild climate it behaves as a perennial, returning for several years. In Hungary, overwintering is possible in favourable gardens, but hard frost and wet winter soil make survival less predictable.
Globe artichoke or Jerusalem artichoke?
|
Globe artichoke |
Cynara cardunculus Scolymus Group. A large thistle relative grown for its unopened flower buds. This is the artichoke in this book. |
|
Jerusalem artichoke |
Helianthus tuberosus. A tall sunflower relative grown for underground tubers. Delicious, but a completely different crop. |
Then understand what you are growing
· The edible part is the unopened flower bud. The fleshy bases of the scales and the tender heart are eaten.
· Plants are large. A mature globe artichoke can reach around 1–1.5 m tall and close to 1 m wide, sometimes more.
· Many traditional varieties crop best from their second year, so patience can be part of the bargain.
· Some varieties have been selected to flower in their first year from seed, which is useful where winter survival is uncertain.
· Green and purple-budded varieties differ in appearance, flavour, hardiness and size, but all need plenty of sun.
· If you do not harvest a bud, it becomes a dramatic purple flower that bees and other pollinators adore.
|
GOOD TO KNOW “Tomato” may look like one crop, but a 35 cm balcony bush and a 2 m climbing vine need very different space and care. Always read the variety description before you choose the pot, support or spacing. |
CHAPTER 2
Choose Your Artichoke
The best artichoke is the one that matches how you intend to grow it: as a perennial showpiece, a first-year crop, or both.
Ask yourself five questions
1. Do I want to try to keep the plant for several years, or grow mainly for a first-season harvest?
2. Can I give each plant roughly a metre of breathing room in a sunny position?
3. Is my winter garden sheltered and well drained, or exposed, cold and wet?
4. Would I prefer classic green buds, striking purple buds, or whichever variety is most reliable?
5. Am I happy to wait until the second season if a traditional variety does not flower in year one?
Beginner-friendly ways to start
|
First-year variety |
Best if you want the strongest chance of buds in the first season from seed. |
|
Traditional green type |
Classic large green buds and a good choice where you hope to overwinter the crown. |
|
Purple-budded type |
Beautiful in both vegetable and ornamental beds; check hardiness before choosing. |
|
Young plant or offset |
The quickest route to a known plant, especially if it comes from a productive established clump. |
|
A COMMON MISTAKE Buying six beautiful varieties without checking whether they are tall vines, compact bushes or very late croppers. Variety choice determines almost everything that follows. |
|
TRY THIS Write the variety name on a durable label as soon as you sow. In July, when every plant is a green jungle, “I’ll remember which one this is” becomes an unreliable system. |
CHAPTER 3
Let’s Sow
Artichoke seed is larger and slower than tomato seed, but it is not difficult. The important thing is to start early enough to grow a substantial plant before summer.
When to sow in Hungary
For most Hungarian home gardeners, February to March is a useful indoor sowing period. Artichokes need a long season, so starting under cover gives them time to develop. If your goal is a first-year crop, choose a variety bred for first-year production and follow its specific instructions.
What you need
· Artichoke seed
· Individual small pots or deep modules with drainage
· Peat-free or good-quality seed compost
· A warm place for germination
· A very bright place for the young plants afterwards
Sowing, step by step
6. Fill pots with moist seed compost and settle it gently.
7. Sow one seed per pot about 2 cm deep, then cover lightly.
8. Water gently and allow excess water to drain.
9. Keep the pots warm and evenly moist, but never waterlogged.
10. As soon as seedlings appear, give them strong light and enough room so the broad leaves can develop without crowding.
|
DON’T PANIC If one variety appears in four days and another takes more than a week, that does not automatically mean anything is wrong. Seed age, variety and temperature all change the speed. |
|
A COMMON MISTAKE Warmth helps germination; darkness after germination does not. Leaving seedlings on a cosy shelf away from the window creates long, weak stems very quickly. |
CHAPTER 4
Seedling School
Young artichokes quickly begin to look serious, with broad leaves and a strong central rosette.
Light and space first
Give seedlings as much light as possible. Crowded, shaded plants stretch and stay soft. Turn pots regularly if they lean toward the window, and keep the leaves from constantly touching neighbouring plants.
Potting on
Move seedlings into larger pots when roots begin filling their first container. Artichokes make a substantial root system, so do not leave them cramped for weeks. Keep the crown at the same level rather than burying the centre of the plant.
Water steadily
Water thoroughly, then allow the surface of the compost to begin drying before watering again. The goal is steady growth, not permanently saturated compost.
Feeding
Once plants are growing strongly in larger pots, a light balanced feed can help. Do not push them with excessive fertiliser. A compact, sturdy plant with several healthy leaves is more useful than a soft, oversized one.
|
WHAT I WOULD DO I look for a seedling with a thick stem, short gaps between leaves and rich green growth. I am not trying to win a “tallest tomato in April” competition. |
|
DON’T PANIC Purple-tinged leaves on cool young plants can be a temporary stress response. First check temperature, light, watering and root space before reaching for a fertiliser bottle. |
CHAPTER 5
Ready for the Real World
Indoor-grown artichokes still need to learn about wind, direct sun and cold spring nights before they live outside permanently.
Hardening off: about 7–10 days
11. Begin on a mild day in a sheltered place with bright light but protection from harsh midday sun.
12. Bring plants back under cover if a cold night or frost is forecast.
13. Increase the time outdoors and the amount of direct sun a little each day.
14. Let the plants experience gentle wind so their leaves and stems become tougher.
15. By the end, they should tolerate a full day outside comfortably and be ready for their permanent position.
When can they stay outside in Hungary?
Artichokes tolerate cool conditions better than tomatoes, but young plants should not be sacrificed to a hard spring frost. In most Hungarian gardens, late April into May is a practical planting period, depending on the forecast. If cold nights return, protect recently planted artichokes with fleece.
A sheltered garden near a warm wall can behave very differently from an exposed plot or frost pocket. Western Hungary may still have chilly nights after warm days, while southern and urban gardens can warm quickly. Watch the local forecast rather than copying a date from another country.
|
A COMMON MISTAKE Hardening off only means “put the plants outside.” Full sun can scorch tender indoor leaves in a single afternoon. Increase exposure gradually. |
|
GOOD TO KNOW Cold is not the only transplant danger. A sudden hot, bright spell can stress young plants too. Shade them lightly for the first afternoon or two if conditions turn fierce. |
CHAPTER 6
Give Them a Good Home
Artichokes are not shy plants. Give them the space and soil they need from the beginning.
The right place
Choose a warm, sunny, sheltered position with fertile, free-draining soil. Winter drainage matters almost as much as summer fertility. If your soil stays wet in winter, a raised bed or improved drainage can make the difference between a crown that returns and one that rots.
Spacing
Allow roughly 75–90 cm between plants as a practical minimum, and more for especially vigorous varieties. Remember that a small spring transplant can become a broad silver-green fountain by midsummer.
Planting day
16. Water the pot before planting so the root ball is evenly moist.
17. Dig a generous hole and mix well-rotted compost into the surrounding soil if the bed is poor.
18. Plant at the same depth the artichoke was growing in its pot; do not bury the crown.
19. Firm gently and water deeply so soil settles around the roots.
20. Add an organic mulch around, but not over, the crown once the soil is warm.
Growing in pots
Artichokes are happier in the ground, but a very large container can work. Think at least about 45 cm wide and deep for one plant, with excellent drainage. Pots dry quickly in Hungarian summer heat and are also more exposed to freezing in winter, so container plants need extra attention at both extremes.
|
TRY THIS Plant one compact cherry tomato close to the kitchen door. The plant you walk past every day is the plant you notice, water and harvest at the right moment. |
CHAPTER 7
Water, Feed & Build a Giant
Once established, artichokes are robust, but their biggest, most tender buds come from plants that never spend weeks struggling for water or food.
Watering
Water newly planted artichokes regularly through their first season. Established plants cope with some drought, but during prolonged Hungarian heat—especially while flower buds are forming—deep watering can improve bud size and quality. Water the soil rather than splashing the crown repeatedly.
Mulch
A generous organic mulch helps hold moisture through hot summers, improves the soil and suppresses weeds. Keep the centre of the crown open so it is not smothered by damp material.
Feeding
A fertile bed enriched with compost is often enough. If growth is weak, or if plants are in containers, feed in spring according to the label of a suitable vegetable fertiliser. Once bud production begins, avoid chasing soft leafy growth with too much nitrogen.
Bud management and first-year patience
Traditional perennial artichokes are often stronger if the first flower stems are removed so the plant can establish a large crown for the following year. First-year cropping varieties are different: their purpose is to produce buds in the first season. Know which type you planted before you reach for the secateurs.
|
WHAT I WOULD DO I water the soil, not the leaves; support the plant before it flops; remove damaged lower foliage; and keep enough healthy leaf cover to protect fruit from fierce sun. |
CHAPTER 8
Big Leaves, Buds & “What Is That?”
Artichoke problems are easier to understand when you remember that this is a large perennial thistle that wants sun, drainage and room.
Lots of leaves but no buds?
A young traditional plant may simply not be mature enough. Some types crop mainly from their second year, while first-year varieties flower sooner. Variety, heat and cool exposure can also affect bud formation. If the plant is healthy, patience may be the right answer.
The beginner’s trouble guide
|
Young leaves full of holes |
Usually slugs or snails. Protect young plants while they are small. |
|
Sticky clusters on leaves or buds |
Often aphids. Check buds regularly and deal with heavy colonies early. |
|
Healthy plant, no buds |
It may be too young or a traditional type that crops from its second year. |
|
Crown rots after winter |
Winter wet is a major danger. Improve drainage and keep the crown airy. |
|
Leaves damaged after a cold night |
Frost can scorch new growth. Protect again if more cold is forecast. |
|
DON’T PANIC One ugly leaf is not a diagnosis. Look for a pattern: Which leaves? Old or new? One plant or all of them? After heat, heavy rain, feeding or pruning? Gardening becomes much easier when you investigate before you treat. |
|
A COMMON MISTAKE Reaching immediately for calcium because of blossom-end rot. Calcium uptake is strongly tied to water movement in the plant; inconsistent moisture is very often the real problem in home gardens. |
CHAPTER 9
Can I Pick It Yet?
Yes—and with artichokes, timing matters because the bud you eat is trying very hard to become a flower.
What “ready” looks like
Harvest when the bud has reached a useful size but the scales are still tight and compact. Once the scales begin spreading and the bud softens, it is moving toward flowering and eating quality declines. The central main bud is usually the largest; smaller side buds follow.
Harvest by stage
|
Small and very tight |
Excellent for cooking more of the bud whole after trimming; tender and quick to prepare. |
|
Full size, scales tight |
The classic harvest stage. Cut before the outer scales begin spreading. |
|
Main bud harvested |
Keep watching: smaller secondary buds often develop lower on the flowering stems. |
|
Scales opening, purple showing |
Too far for the best eating quality—leave it to flower and enjoy the pollinators. |
How often should I check?
During warm weather, inspect plants every few days. Buds can move from tight and perfect to opening surprisingly quickly. Cut with clean secateurs, leaving a short length of stem attached.
|
READY TO HARVEST? Colour is your first clue, touch is your second, and the variety description is your referee. If the fruit has reached its expected colour and gives slightly under gentle finger pressure, taste one. Your mouth will teach you the final stage better than any chart. |
|
TRY THIS Do a “tomato tasting” with three varieties on the same plate. Slice, salt lightly and compare sweetness, acidity, skin, texture and aroma. It is the easiest way to decide what deserves space next year. |
CHAPTER 10
From the Garden to the Kitchen
An artichoke looks complicated until you cook the first one. Then the strange armour begins to make sense.
The first rule: harvest young and cook simply
Large artichokes are usually steamed or simmered until the outer scales pull away easily. Eat the tender flesh from the base of each scale, then remove the fibrous choke to reveal the heart. Smaller young buds can be trimmed and roasted, grilled or sautéed.
Match the artichoke to the job
· Large tight buds: steam or simmer whole and serve with lemon, vinaigrette or melted butter.
· Medium buds: halve after trimming, then braise, grill or roast.
· Small tender buds: remove tough outer scales and cook more of the bud whole.
· Opened buds: enjoy them as spectacular purple flowers for pollinators rather than forcing them onto the dinner plate.
|
FROM THE KITCHEN Quick roasted tomatoes: halve ripe tomatoes, place cut-side up, add a little olive oil, salt and herbs, then roast until concentrated and jammy. Eat immediately, spoon over pasta, or cool and freeze in meal-size portions. |
Storing fresh artichokes
Artichokes are best soon after harvest. If you cannot cook them immediately, keep them cool and refrigerated in a loosely closed bag so they do not dry out. Their quality is more about freshness than long storage.
When you have more than you can eat
Cook extra hearts for salads, pasta, risotto or pizza, or preserve them using a reliable tested recipe. Artichokes are low-acid vegetables, so shelf-stable preserving requires a safe, tested method rather than improvisation.
CHAPTER 11
Next Season Starts Now
With artichokes, next season may already be sleeping inside the crown at your feet.
Keep a tiny garden record
· Variety name and whether it was chosen for first-year or perennial production
· Sowing date and outdoor planting date
· Date of the first bud
· Bud size and flavour: would you grow it again?
· How the plant handled summer heat
· How well the crown survived winter protection
· How much space the mature plant really needed
Overwintering and making new plants
In a mild, sheltered Hungarian garden with freely draining soil, globe artichokes may return for several years. In colder or exposed places, survival is less certain. After the foliage fades, remove damaged growth, protect the crown from severe frost and—most importantly—avoid creating a soggy winter blanket that traps water around the centre.
21. After autumn dieback, tidy away collapsed or diseased leaves but keep useful dry material for protection if it stays airy.
22. Cover the root zone with a generous dry mulch such as straw, leaves or compost, keeping the crown from sitting wet.
23. During severe cold spells, add fleece or another breathable protective layer over young plants.
24. In spring, remove heavy protection gradually as growth resumes and check the crown for healthy new shoots.
25. Established clumps can eventually be divided, and vigorous offsets with roots can be replanted to make new plants identical to the parent.
|
GOOD TO KNOW Tomatoes usually self-pollinate, so home-saved seed often comes true, but accidental crossing is still possible. If preserving a variety exactly matters to you, learn isolation or blossom-bagging techniques. |
|
WHAT I WOULD DO At the end of the season I choose only three notes: “definitely again,” “maybe,” and “never again.” That tiny habit improves the garden faster than buying more seed. |
COME GROW WITH ME
ARTICHOKE CHEAT SHEET
The page to come back to when you have soil on your hands and no time to reread the whole book.
|
SOW |
February–March indoors |
About 2 cm deep |
|
GERMINATE |
Warm, lightly moist compost |
Give strong light after emergence |
|
PLANT OUT |
Late April–May in many gardens |
After hard-frost risk; harden off first |
|
POSITION |
Full sun; warm and sheltered |
Fertile, very well-drained soil |
|
SPACE |
About 75–90 cm or more |
Mature plants can approach 1 m wide |
|
Water |
Regularly in the first season; deeply in long hot spells, especially while buds form. |
|
Feed |
Start with compost-rich soil; feed in spring if growth or cropping is weak. |
|
Winter |
Protect the crown from severe frost, but keep it airy and well drained. |
|
First year |
Traditional types may need a season to establish; first-year varieties are bred to crop sooner. |
|
Harvest |
Cut buds when full-sized but still tight, before the scales begin to open. |
|
Big warning |
Winter wet and severe frost are the biggest challenges to perennial artichokes in Hungary. |
|
HUNGARY IN ONE LINE Sow in late winter/early spring, build sturdy seedlings indoors, harden them carefully, and plant outdoors only when local conditions—not impatience—say the cold risk is over. |


