

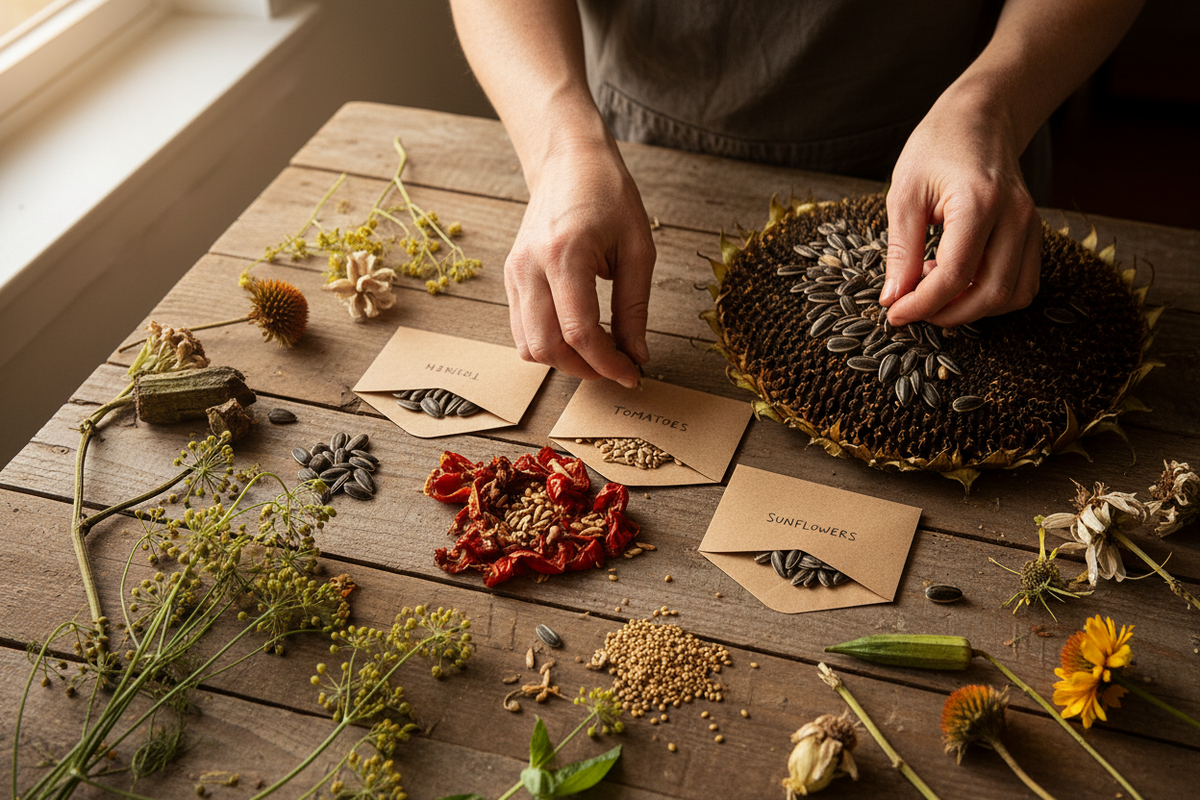
There is a moment at the end of every growing season when most gardeners clear the beds, bag the spent plants, and begin browsing seed catalogues for next spring. A quieter approach exists: save seeds from your best plants this season and you will have something far more valuable than a packet off a shop shelf. You will have seeds already adapted to your soil, your climate, and your garden's particular rhythms.
To save seeds successfully, the basic process involves choosing the right plant varieties, harvesting seeds at peak maturity, drying them thoroughly, and storing them in cool, dark, dry conditions. Done well, this cycle costs almost nothing and pays dividends for years.

Key Takeaways
-
Choose open-pollinated or heirloom varieties: As Penn State Extension's seed saving guide explains, heirloom plants have been open-pollinated over time and produce offspring with the same characteristics as the parent, the trait that makes seed saving reliable.
-
Start with self-pollinators: According to the International Seed Saving Institute via GrowVeg, the five best crops for beginners are beans, lettuce, peas, peppers, and tomatoes, all self-pollinating, all achievable in a single season.
-
Dryness is everything: Vegetable Gardening states plainly that any moisture left in the seed when you package it will likely cause it to break down and fail to germinate next year, so patience during drying is non-negotiable.
-
Store correctly and seeds last for years: Johnny's Selected Seeds' viability guide confirms that seeds stored under cool, dry conditions at around 5°C with low humidity remain viable for one to several years, meaning your effort this autumn can serve you through multiple springs.
Quick-Start Prioritisation Framework
| Crop / Plant | Best For | Effort Level | Time to Dry Seeds |
|---|---|---|---|
| Beans and peas | All beginners | Low | 2 to 4 weeks on plant |
| Tomatoes | Intermediate beginners | Medium (fermentation step) | 3 to 5 days after fermenting |
| Peppers | Most home gardeners | Low | 1 to 2 weeks on paper |
| Lettuce | Compact gardens | Low | Let bolting occur naturally |
| Marigolds and zinnias | Flower gardeners | Very low | 2 to 3 weeks on head |
| Squash and cucumber | Experienced beginners | Medium (cross-pol. risk) | 2 weeks after rinsing |
Start here if you are:
-
A complete beginner: Beans and peas, pods dry on the plant, seeds shell out cleanly, no special treatment needed.
-
A vegetable-focused gardener: Tomatoes and peppers are rewarding and the fermentation process for tomatoes is straightforward once you do it once.
-
A flower grower: Marigolds are the ultimate beginner's flower seed, wait for the head to dry, pinch it open, and you have dozens of seeds.
-
Keen on sustainability: Focus on any heirloom variety that performs well in your space; the plants will adapt to your conditions more closely with each generation.
Step 1, Choose the Right Plants and Varieties
Only Open-Pollinated and Heirloom Varieties Qualify
This is the single rule that determines whether your effort is worthwhile. The Old Farmer's Almanac's seed-saving guide is unambiguous: save seeds only from open-pollinated varieties, because these are plants in which offspring replicate the parents, giving you the same wonderful vegetable year upon year. Hybrid seeds, typically marked F1 on the packet, will not breed true; the plants grown from saved hybrid seed are unpredictable, often inferior, and sometimes completely unpalatable.
In practice, this means checking your seed packets before the season ends. The abbreviation 'OP' indicates open-pollinated. The word 'heirloom' is your other green light. If the packet says 'F1', set those plants aside and grow them for eating only.
Select for Vigour, Not Convenience
Growing In The Garden's seed saving resource captures the core logic well: seed saving is a form of selection, and the seeds you save today shape the garden you will grow tomorrow. This means resisting the urge to save from the smallest, earliest-ripening, or most convenient fruit. Choose the healthiest, most vigorous plants, the one with the darkest leaves, the strongest stem, the fullest flavour.
Penn State Extension adds practical guidance here: if your tomato variety should be round, dark red, and baseball-sized, do not save seeds from fruits that are pale, elongated, or undersized. Save from the one that perfectly represents what you wanted when you planted the variety in the first place.
Pro Tip: Mark your seed-saving plants early in the season with a small label or coloured cane. Once you have identified a strong, healthy specimen, leave it alone, no harvesting from it for eating, and allow it to reach full biological maturity.
Step 2, Know When Seeds Are Truly Ready
Patience Past the Eating Stage
One of the most common mistakes beginners make is harvesting too early. Growing In The Garden states plainly that the best time to harvest a vegetable for eating is often not the best time to save its seed. Seeds need time to fully mature on the plant to become viable, which means allowing the fruit or seed pod to stay on the plant well past the eating stage.
For beans and peas, Ready and Prepped's vegetable seed guide advises letting pods dry on the plant until they rattle. For peppers, seeds ripen only when the fruit reaches its full colour, red, yellow, or orange, not when they are still green. For cucumbers or squash intended for seed saving, the fruit must ripen well beyond the eating stage: cucumbers turn yellow-orange and squash develops a hardened skin.
Flowers and Herbs: The Bolting Approach
For leafy crops like lettuce and herbs, Roots and Refuge's complete seed saving guide explains the bolting process: allow the plant to grow past the edible stage until it sends up flower stalks. Let the flowers grow and die back, then cut the dry heads over a piece of paper or a plate to catch the falling seeds. The same principle applies to root vegetables such as carrots, radishes, and beets, these are biennial crops that need to survive winter before setting seed, which University of Minnesota Extension's vegetable seed guide notes makes them considerably harder to manage than annual crops.

Step 3, Harvest and Process Seeds Correctly
Dry Seeds: The Simple Approach
For beans, peas, peppers, marigolds, zinnias, and most flower heads, the process is straightforward. Hobby Farms' seed drying guide recommends spreading seeds out on a plate, wide bowl, or baking sheet so they do not touch, then leaving them to rest for a week to ten days before stirring gently and drying for another two to three weeks. Good air circulation matters more than warmth, so a well-ventilated room is ideal.
A useful trick for flower heads and stalks: Hobby Farms describes placing the entire flower stalk or head into a brown paper bag, tip first, allowing the stem to stick out of the opening. As the head dries, seeds fall naturally into the bag. This is particularly effective for lettuce, dill, and calendula. Whatever method you choose, Show Me Oz's seed drying guide is emphatic: seeds should never be dried in an oven, dehydrator, microwave, or in direct sunlight, as high temperatures kill the embryo inside the seed.
Wet Seeds: The Fermentation Method
Tomatoes require a different approach because their seeds are coated in a germination-inhibiting gel. The Old Farmer's Almanac describes the fermentation process: squeeze or spoon the seed mass into a waterproof container, add enough water to equal the seed mass volume, and place in a warm spot out of direct sunlight. Stir at least once daily. Within a couple of days, viable seeds sink to the bottom while bad seeds, debris, and white mould float to the surface. Drain the liquid, rinse the viable seeds, and spread them on a ceramic plate or mesh screen to dry thoroughly. Cucumber seeds follow the same method.
Pro Tip: After fermenting tomato seeds, spread them on a ceramic plate rather than paper towel. Weregreenly's heirloom gardening guide notes that tomato seeds stick badly to paper fibres, making them very difficult to remove cleanly once dry.
Step 4, Store Seeds So They Last
The Core Conditions: Cool, Dark, and Dry
New York Botanical Garden's seed storage guide provides the essential principle: seeds need moisture, warmth, and light to germinate, so give them the exact opposite when storing, a dry, cool, dark environment. A basement, a cool cupboard, or a north-facing room all work well for home storage.
Seed Savers Exchange recommends a relative humidity of 40% or lower for both drying and storing seeds. At higher humidity levels, seeds metabolise faster, burning through energy reserves they will need for germination. If your home is damp, adding a silica gel desiccant sachet to your storage container gives meaningful protection. University of Minnesota Extension suggests an equal alternative: one to two tablespoons of powdered milk wrapped in cheesecloth, which will absorb excess moisture from the air for around six months.
Containers and Labelling
Paper envelopes inside a sealed glass jar is the classic combination, endorsed by sources ranging from Vital Seeds to Johnny's Selected Seeds. Paper allows slight breathability while the sealed jar provides the cool, dark, dry environment. Always label each envelope with the crop name, variety, date harvested, and any notes about the plant's performance. Azure Farm Life's seed guide points out that seeds from corn, spinach, chives, and alliums have higher oil content and the shortest storage life, use them within a year. Tomatoes, cucumbers, and squash seeds, by contrast, can remain viable for up to three years when properly stored.
Pro Tip: Test viability before spring planting. Place ten seeds on a damp paper towel, fold it, seal it in a bag, and place it somewhere warm. Check after a week. The Old Farmer's Almanac's viability guide recommends this as the most reliable way to judge whether old saved seeds are worth sowing. If fewer than five of ten germinate, sow thickly or source new seed.
Step 5, The Bigger Picture: Why Seed Saving Matters
Local Adaptation and Cost
When you save seeds from your own thriving plants year after year, Birch Community Services' sustainability guide describes something remarkable: those seeds begin to adapt, learning your soil, your seasons, your rainfall, and your pests, with each generation becoming hardier and more suited to your specific environment. Store-bought seeds are bred for general conditions; your saved seeds are bred for your garden.
The financial case is straightforward. Verdenook's 2026 home garden ROI analysis found that a modestly managed home vegetable garden typically returns £5 to £15 of produce for every £1 spent on seeds and basic supplies, and that figure improves further when you eliminate the annual seed-buying cost altogether. Frugal Gardening's financial breakdown estimates that once a garden is established, annual costs can drop to as little as £30 to £50 for seeds, compost, and fertiliser combined. If you save your own seeds, that figure drops further still.
Biodiversity and Chemical-Free Horticulture
The Food and Agriculture Organisation of the United Nations, as cited by Weregreenly, estimates that we have lost nearly 75% of plant genetic diversity in agriculture over the last century. Every heirloom seed saved and grown at home helps reverse that trend in a small but meaningful way. Seed Armory's heirloom seed guide notes that a garden filled with heirloom seeds contributes to a broader range of plants, supporting local ecosystems and ensuring resilience against pests and diseases.
This matters particularly for gardeners committed to chemical-free growing. At Holland Kertészet, the emphasis on sustainable, organic horticulture aligns closely with seed saving practice: heirloom varieties, as Heirloom Gardening's ecological guide explains, naturally lean towards organic and regenerative practices because they have not been bred for chemical-heavy industrial farming, meaning they tend to perform better in gardens where soil health, composting, and natural pest control are the priority.

Common Seed Saving Mistakes to Avoid
Saving from Hybrid Plants
Saving from F1 hybrid varieties is the single most common beginner error. The House and Homestead's seed guide explains what happens: when you replant hybrid seed, the plant reverts to one of the parent varieties or produces an unpredictable combination, often unpalatable and definitely not what you expected. Check the packet before the growing season starts, and plan your seed saving around open-pollinated varieties only.
Ignoring Cross-Pollination Risk
Cross-pollination creates hybrids naturally. University of Minnesota Extension provides a vivid example: popcorn can pollinate sweet corn from a neighbouring garden on a windy day, producing a seed that is neither good sweet corn nor good popcorn. For beginner seed savers, the practical solution is to grow only one variety of any given species per season, or to choose self-pollinating crops like beans, peas, tomatoes, and peppers that handle their own pollination before insects can intervene.
Storing Seeds Before They Are Fully Dry
Vegetable Gardening makes this point clearly: any moisture remaining in a seed when it is packaged will likely cause it to break down and fail to germinate. Bean seeds in particular feel dry to the touch when freshly harvested but still hold significant internal moisture. The test: try to press your fingernail into a bean seed. If it leaves a dent, the seed needs more drying time.
Frequently Asked Questions
What is the difference between heirloom and open-pollinated seeds?
All heirloom seeds are open-pollinated, but not all open-pollinated seeds are heirlooms. Our Home and Heritage's seed saving guide explains that open-pollinated plants are those pollinated naturally by wind, insects, or other means, while heirlooms are a subset that have been passed down through generations for 50 years or more, often for their superior taste, colour, or resilience. Both are suitable for seed saving; hybrids (F1) are not.
How long will my saved seeds remain viable?
It depends on the crop and storage conditions. Garden Betty's seed viability guide reports that most vegetable seeds last two to three years after their packing or harvest date. Onion seeds deteriorate after just one year, so use those quickly. Tomatoes, cucumbers, and many brassicas can remain viable for up to five years in ideal conditions. Calendula and nasturtium seeds are notable long-lifers, lasting six years or more. Always run a germination test on older seeds before relying on them for a full season's planting.
Can I save seeds from vegetables bought at the supermarket or farmers' market?
Occasionally, but with caution. Supermarket produce is very often from hybrid varieties, meaning saved seeds will not grow true to type. Your best chance is with heritage tomatoes, peppers, or squash purchased from a small-scale grower who can confirm the variety is open-pollinated. As a rule, seed saving works most reliably with plants you have grown yourself from clearly labelled open-pollinated or heirloom seed.
Do I need any special equipment to save seeds at home?
No. The requirements are minimal: a clean plate or mesh screen for drying, paper envelopes or small paper bags for labelling and initial storage, a glass jar with a lid for longer-term storage, and optionally a silica gel desiccant sachet. Seed Savers Exchange notes that a cool, dark, dry, and pest-free spot is all you need; you probably already have everything required.
When should I test saved seeds before spring sowing?
Test four to six weeks before your intended sowing date. Place ten seeds on a damp paper towel, fold it, enclose it in a bag, and keep it somewhere warm. The Old Farmer's Almanac recommends checking after a week or so. If seven or more of ten germinate, your seed stock is healthy. If fewer than five germinate, sow more thickly than usual to compensate, or obtain fresh seed for that variety.
Sources
-
Seed Saving Basics, Penn State Extension. https://extension.psu.edu/seed-saving-basics
-
Planning for Seed Saving, GrowVeg. https://www.growveg.com/guides/planning-for-seed-saving/
-
A Beginner's Guide to Saving Seeds, Zone 3 Vegetable Gardening. https://www.zone3vegetablegardening.com/post/a-beginners-guide-to-saving-seeds
-
Seed Viability and Storage Guide, Johnny's Selected Seeds. https://www.johnnyseeds.com/growers-library/reference-documents/seed-storage-guidelines.html
-
How to Save Seeds, Growing In The Garden. https://growinginthegarden.com/how-save-seeds/
-
How to Save Vegetable Seeds, The Old Farmer's Almanac. https://www.almanac.com/how-save-vegetable-seeds
-
How Long Do Seeds Last?, The Old Farmer's Almanac. https://www.almanac.com/how-long-do-seeds-last
-
Saving Vegetable Seeds, University of Minnesota Extension. https://extension.umn.edu/planting-and-growing-guides/saving-vegetable-seeds
-
How to Dry Seeds: 3 Techniques, Hobby Farms. https://www.hobbyfarms.com/how-to-dry-seeds-3-techniques/
-
Seed Drying and Storing, Show Me Oz. https://showmeoz.wordpress.com/2014/10/15/seed-saving-time-drying-and-storing-your-home-grown-seeds/
-
Cleaning, Drying, and Storing Seeds, New York Botanical Garden. https://www.nybg.org/blogs/plant-talk/2010/11/tip-of-the-week/tip-of-the-week-cleaning-drying-and-storing-seeds/
-
How to Store Seeds, Seed Savers Exchange. https://seedsavers.org/storing-seeds/
-
How to Dry and Store Seeds, Vital Seeds. https://vitalseeds.co.uk/growing-resources/seed-saving-resources/how-to-dry-and-store-seeds/
-
How to Save, Dry, and Store Garden Seeds, Azure Farm Life. https://www.azurefarmlife.com/farm-blog/how-to-save-dry-and-store-garden-seeds-for-next-year
-
A Complete Guide to Seed Saving, Roots and Refuge. https://rootsandrefuge.com/a-complete-guide-to-seed-saving/
-
Sustainability in Gardening: Seed Saving, Birch Community Services. https://birchcommunityservices.org/blog/sustainability-in-gardening-seed-saving
-
Home Garden ROI 2026, Verdenook. https://verdenook.com/articles/economics-home-gardening-financial-analysis
-
How Much Money Can You Really Save Growing Your Own Food, Frugal Gardening. https://www.frugalgardening.com/how-much-money-can-you-really-save-growing-your-own-food.html
-
Seed Saving to Save Money, ABC7 New York. https://abc7ny.com/post/how-save-money-growing-own-food-tips-experts/18951361/
-
Guardians of the Seed: Heirloom Gardening, Weregreenly. https://weregreenly.com/guardians-of-the-seed:-reviving-heirloom-gardening-for-a-sustainable-future
-
Powers of Heirloom Seeds, Seed Armory. https://seedarmory.com/blogs/news/powers-of-heirloom-seeds-why-theyre-vital-for-gardening
-
The Quiet Revival: Heirloom Gardening, Weregreenly. https://weregreenly.com/the-quiet-revival:-heirloom-gardening-and-the-quest-for-resilient-living
-
How to Save Seeds: Seed Saving for Beginners, The House and Homestead. https://thehouseandhomestead.com/how-save-seeds/
-
How Long Do Seeds Really Last?, Garden Betty. https://gardenbetty.com/how-long-do-seeds-really-last-plus-a-cheat-sheet-on-seed-storage-life/
-
Seed Making Made Simple, Our Home and Heritage. https://ourhomeandheritage.com/seed-saving/


